Of all of the beautiful partnerships in the world, could there be anything more perfect than peanut butter and chocolate? I think not! As in any good relationship, both chocolate and peanut butter can stand firmly on their own merits, but when put together, true magic happens. Whether its freshly ground dark chocolate peanut butter at Whole Foods, a grilled peanut butter and chocolate sandwich, or Moose Tracks ice cream on a hot summer day, I love me some chocolate and peanut butter in just about any form!
Of course, no conversation regarding peanut butter and chocolate is compete without paying homage to good ol’ Reese’s. If I don’t feel like baking (yes, it happens), I seek out alternative sources to fulfill my cravings. I have never been disappointed when I rip into that tell-tale orange wrapper and sink my teeth into that creamy peanut butter filling that is tenderly enclosed in rich milk chocolate…but I have been too lazy to go to the store to buy one when nothing else will satisfy. Since I know that a craving as strong as this one just doesn’t disappear on its own, I did what any good sugar addict Modern Day Martha would do: I figured out how to make them myself, only in bar form because its easier and that means less time in between construction and consumption.
Step #1: Measure out 1 c each of graham cracker crumbs and icing sugar – artwork optional.
Step #2: Melt 1/2 c butter and 1/2 c peanut butter, and take the blurriest picture known to blog readers on the wrong camera setting.
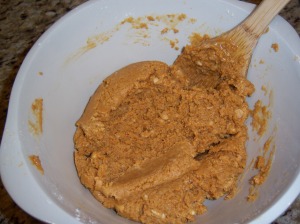
Step 3: Mix them together. I feel like a yenta – I’m making connections between soul mates!
Step #4: Press the mixture into a pan that’s been lined with parchment paper, unless you enjoy making your life more complicated than necessary.
Step #5: Melt some chocolate chips (I used about a cup of semi-sweet, but you could use milk chocolate if you want to) and a few tablespoons of peanut butter in the same pan that you melted the butter and peanut butter in earlier. Once again, only wash/use a new pan if you enjoy delaying the amount of time it will be until you can eat a bar. Or five.
Step #6: Taste a bit of the chocolate for quality control purposes, and then spread it on top of the bars.
Step #7: Stick the whole pan in your fridge, and forget about it for 2 days.
HA! You didn’t believe me on that last step, did you?!?!
Or…once they’ve chilled and the chocolate has hardened, let the bars sit on the counter for about 30 minutes before attempting to cut. I know, it’s weird to tell you to put them in the fridge so the chocolate hardens and then take them out of the fridge so its soft again, but you’re just going to have to trust me. I know I’m difficult to deal with sometimes, but trust is the foundation for any good relationship.
Step #8: Eat as many as you can handle in a 24-hr period, and then feed the rest to your friends and co-workers once you realize that you shouldn’t be left alone with something this delicious. Hey, its either their diets being sabotaged or mine!
Step #9: Fall in love all over again.


Peanut butter and chocolate DO make a wonderful partnership. Now could you come up with a recipe that includes ice cream too…now there’s a tasty threesome;)
So wonderful! I had to tell you since I saw this post I have been wanting to make it, so I did 🙂 I tagged you in it (hope you don’t mind!) and here’s the link! Thanks for sharing.
http://motherdaughtereatwell.blogspot.com/2010/07/amish-friendship-bread-peanut-butter.html
Thanks for the link Carrie! So glad you made the bars and enjoyed them…isn’t peanut butter and chocolate the best?!?! Looking forward to checking out your blog later 🙂
Pingback: Peanut Butter Cookies | Modern Day Martha
Pingback: Chocolate Swirled Peanut Butter Banana Bread | Modern Day Martha